


3 Steps No Heat Korean Style Wavy Hair Tutorial
this is so easy and unoriginal, after you watch it you'll probably go "what!? this is nothing new at all!". i say it's unoriginal because it's the classic french braid. but it's quite "new" in a sense that.. i don't remember seeing anyone doing a french braid to get wavy curls like i do. i actually discovered this method by chance because i usually do my hair into a french braid before i exercise so that my hair won't be all over the place. i feel like a pony tail is going to strain my scalp too much with my little tail swishing in air from left to right periodically.
there was this particular day when i went out for an extended strolling session that left me entirely soaked in my own sweat. by the time i got home the sweat has evaporated, and right before i went to shower i noticed just how beautiful my hair has become - those waves! exactly what i've been trying to recreate with my three barrel tongs!
while i love my heat tools, i try not to use them too often as heat will damage hair. i can try my best to condition it after, but prevention is always better than cure. this no heat method is as good as it can get! the only caveat - you need time, and you need to know how to braid.
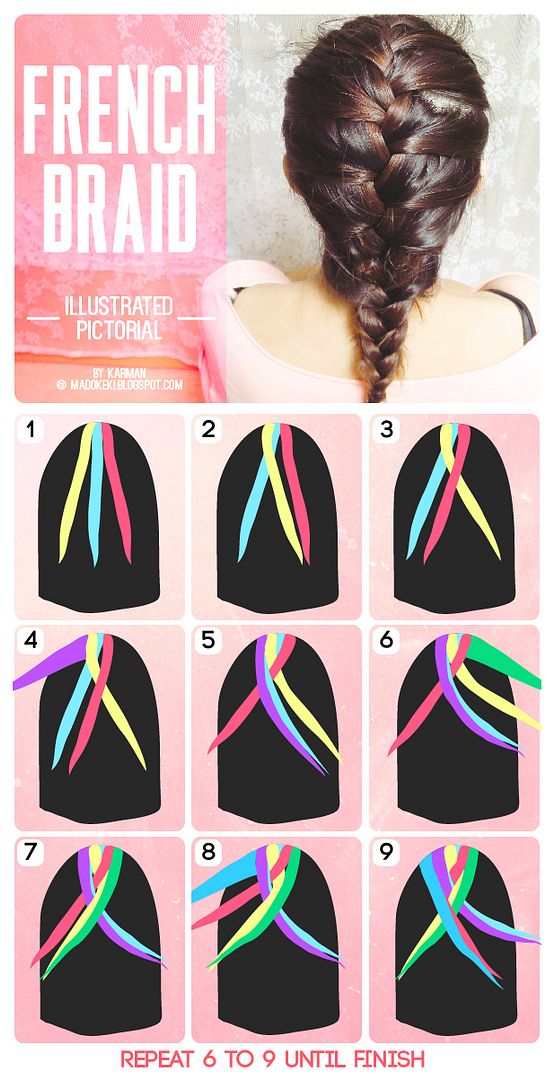
don't worry if you don't know how to do a french braid, i got you covered ;) scroll down for an illustrated pictorial! or you can watch the video below to get the hang of how i coordinate my fingers when i braid my own hair.
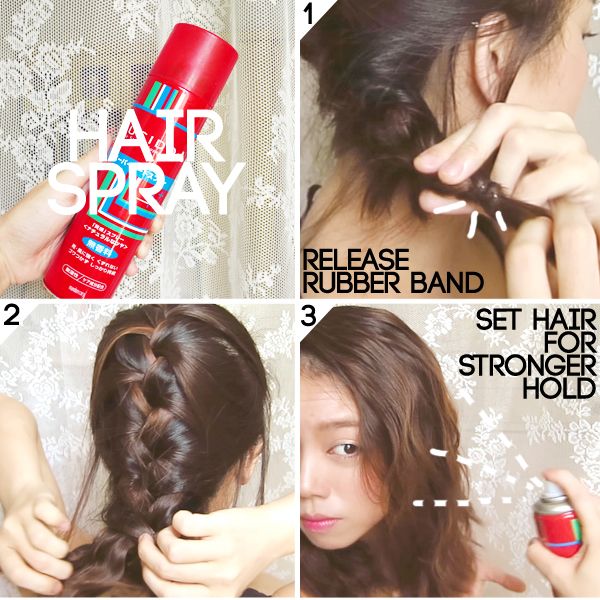
PRODUCTS USED______________________________________________________________
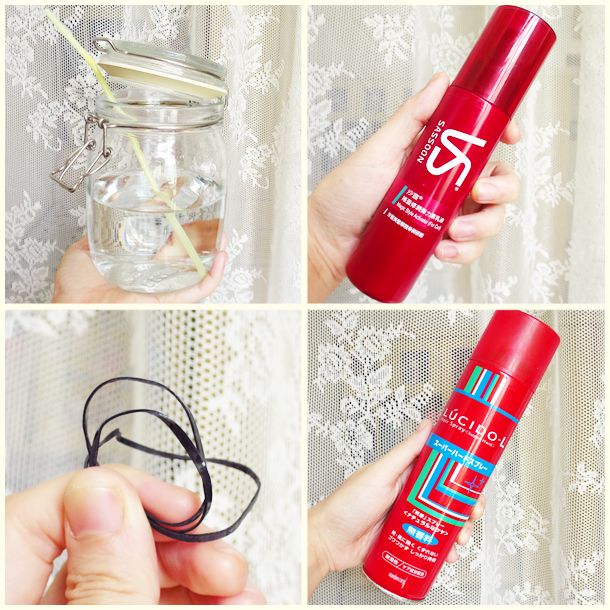
left to right, clock wise motion:
1. water
2. vidal sassoon magic style activator for curls (leave in conditioner, this is optional)
3. lucido l hair spray (very hard)
4. rubber bands
you really only need 1, 3 and 4. if you have super fine and straight hair, replace 2 with a curling mousse or curling cream, whatever that can give your hair more grip and hold to maintain the waves.
PICTORIALS:
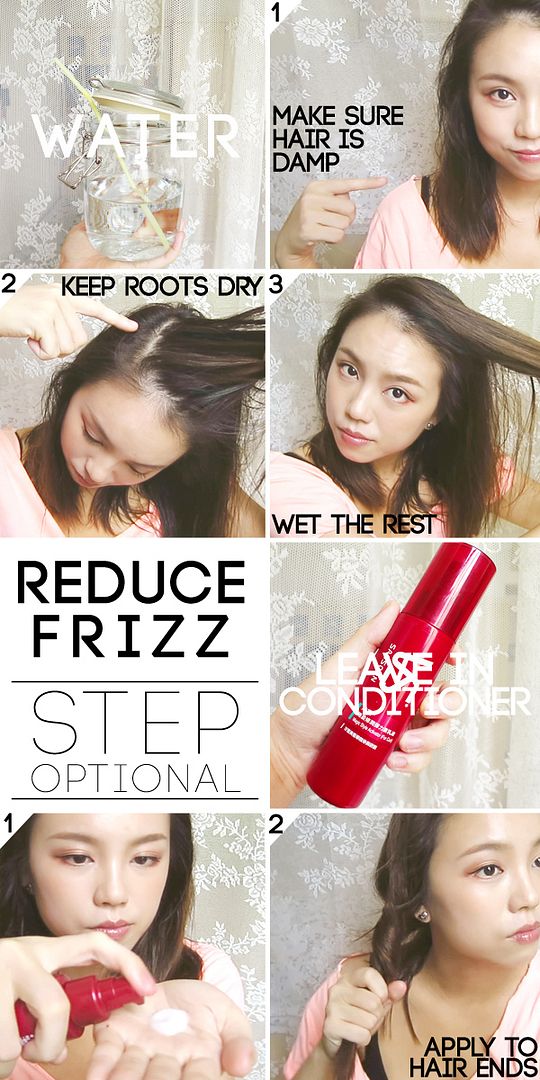
STEP 1: WET YOUR HAIR
in the world of hair styling, there are two methods to change the "shape" of your hair - going from wet to dry, and going from hot to cold. we're obviously employing the wet to dry method here, so dampen your hair (if you started out with dry hair) or dry it a little (if you started off with wet hair). it should be damp but not dripping wet - being able to hold a curl/twist is a good gauge.
keep the roots dry because a wet scalp is not that great for your head (my mom says).
i threw in a conditioning step because why not? i bought the product a while ago but seldom use it. thought my hair could use some extra nourishment, and this is also me trying to show you a way to help your hair be less frizzy if you happen to have frizzy hair - "moisturize" your hair.
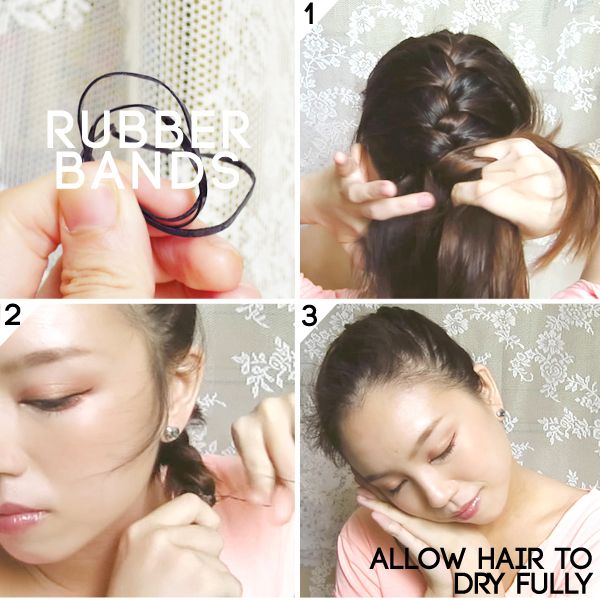
STEP 2: FRENCH BRAIDING
as i mentioned in the video, the beauty of the french braid is that it allows us to customize our curls/waves.
if you want tighter curls: make your braids smaller by sectioning your hair into 2 or more sections
if you want looser waves: stick to the one braid that i'm doing
if you want your curls to start nearer to the roots: also make your braids smaller so as to reduce the distance between the side of your head and the main braid (please refer to the video for annotations if you are unclear)
if you want your curls to start further away from the scalp: also stick to the one braid, but feel free to play around with the position, you can let it be on your left side of the head (so the waves would start closer to your scalp on the left side and further from your scalp on the right side)
just braid and carry on with your stuff until your hair is fully dry. i go to sleep once my hair is less damp, i try to factor in the additional 3-4 hours so that i can braid much earlier before my sleeping time.
tutorial for french braiding! YOU'RE WELCOME! ;)
STEP 3: LOOSEN AND SET
once your hair is fully dry, you can remove your rubber band and loosen your hair. set it with a hair spray for extra hold so as to ensure the waves stay curled all day!
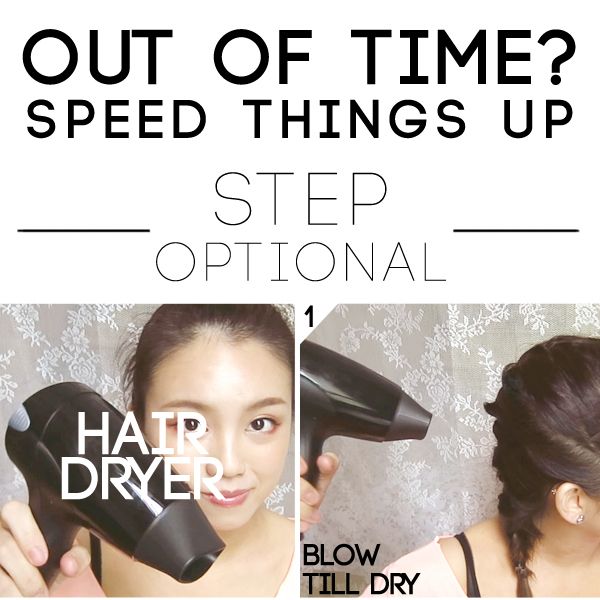
STEP OPTIONAL: DRYING WITH HAIR DRYER
if you're out of time, there's a way to speed up the drying : heat. just make sure to let your hair cool down completely before releasing the curls, this is because curling hair with heat is just like making jelly. if it's not completely cooled, the hair won't set and will just straighten itself. what a waste of effort!
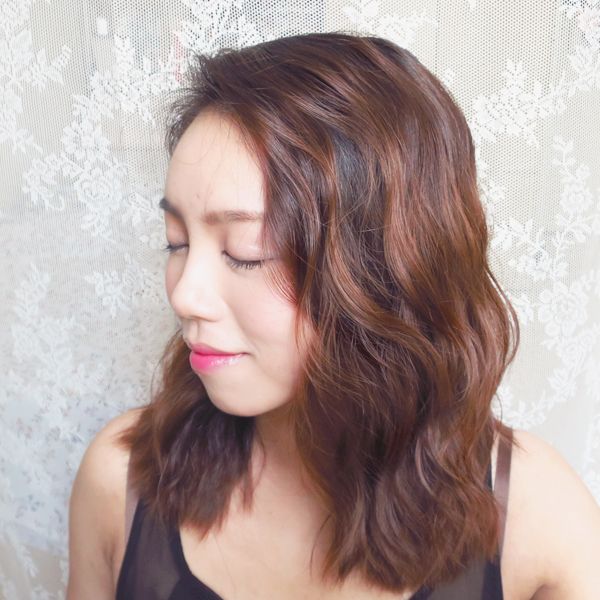
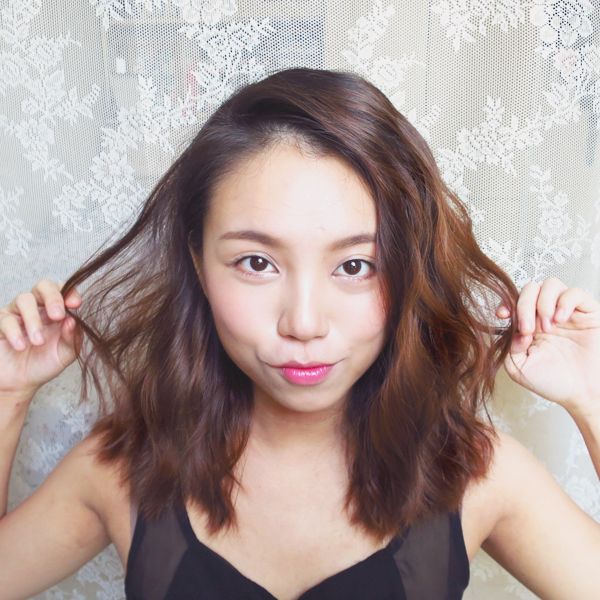
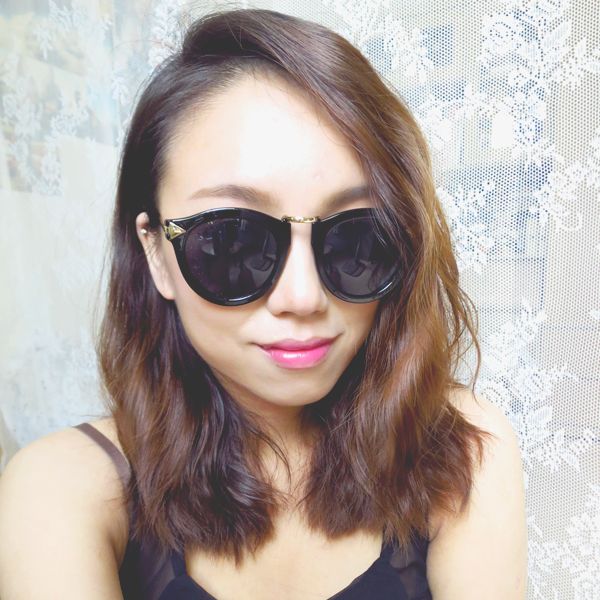
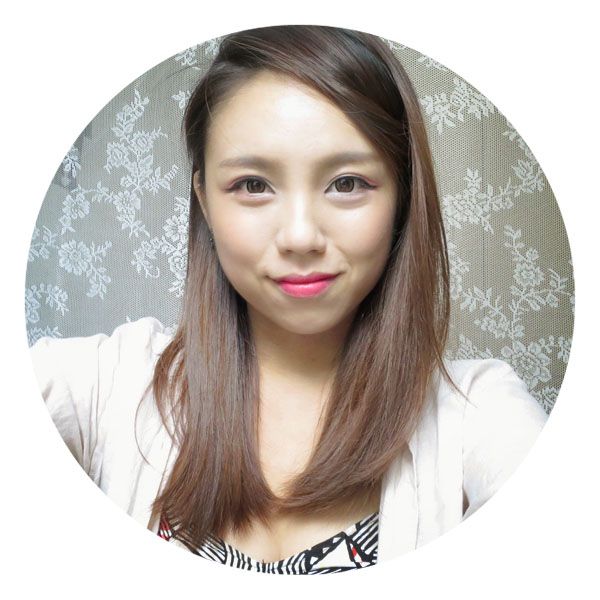
FINAL LOOK:
BEFORE YOU GO:
the method i share right here is a way to CURL your hair. whether or not your curls stays throughout the day has nothing much to do with the method, instead it's the way you set your curls. use hard hair spray for maximum strength, misting it all over your curls will reduce the tendency for it to stiffening your hair into a plastic wig cap. also, if you stay in a very humid climate (which is well known for reducing the curls to nothingness), prepping your hair with a curling mousse will greatly improve the longevity of the curls.
last but not least, remember to avoid getting styling products onto the roots (unless it's one of those products for volume at the roots), and if you do, make sure you clean your scalp properly to prevent accumulation of products in the hair follicles (which will lead to hair loss in the long run).
that's all for this week's sharing! hope you like this method as much as i do! i really love it SO MUCH because i used to spend 30 minutes curling my hair for events.. but braiding my hair takes less than 5 minutes. whatever time that's needed to dry my hair is spent very productively doing other things as i have both of my hands free.
xoxo
karman


No comments:
Post a Comment