


Fall Makeup #1: Burgundy Smokey Eyes For Asian Eyes
i'm surprised how much love this look garnered when i first shared it on my instagram. i thought the look was a little to dark for daily looks, but SURPRISE SURPRISE! so here's a tutorial on it :D
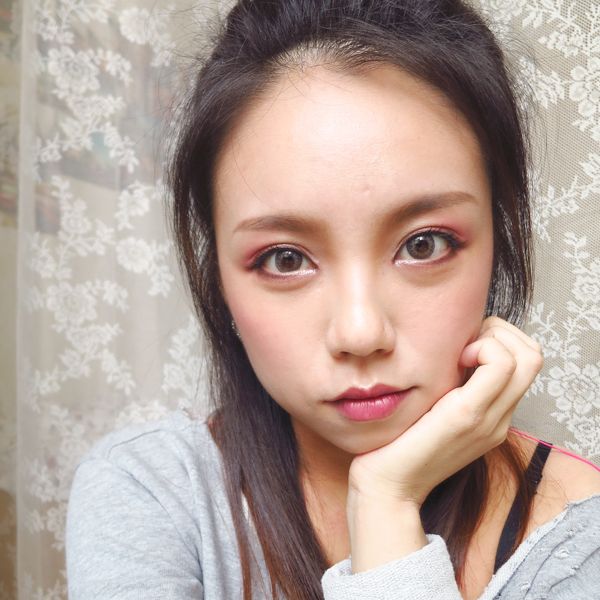
it's definitely fall inspired, it's probably the only time i can feel comfortable wearing this much burgundy colour out in public. and that berry tinted lips? I LOVE IT. wearing it full on makes me look too old for my liking, therefore a slight tint (with a touch of gradient lips) is the best way for me!
i have been experimenting with burgundy of late, and i realize it works best when i apply it to the outer corner instead of all over my eyelids because the latter will give me a bruised eye look. =_=
i believe this will work for almost all kinds of asian eyes because of 2 reasons:
1) asians tend to have a smaller "double-eyelid-fold to eyebrow" distance when the eyes are open. it's safe for us to place the main colour on the outer corner instead so that the colours can be seen blending into the skin (as opposed to being hidden by our eyelid folds). of course, there are some asians with a lot of eyelid space to place with, this look will still suit you though!
2) i'm using the eye socket as a guide for this eye look. whatever makeup looks that references the eye socket will technically conform to each and everyone's original proportions much more better than if i were to use any fixed number like "5mm above your eyelids".
browns with a reddish hue (think of rose golds) will complement the burgundy well. i'm not sure how this look will turn out if you used yellowish browns. the kate colorcious diamond palette that i own happens to be pinkish/reddish toned.
watch the video tutorial here!
PRODUCTS USED____________________________________________________________
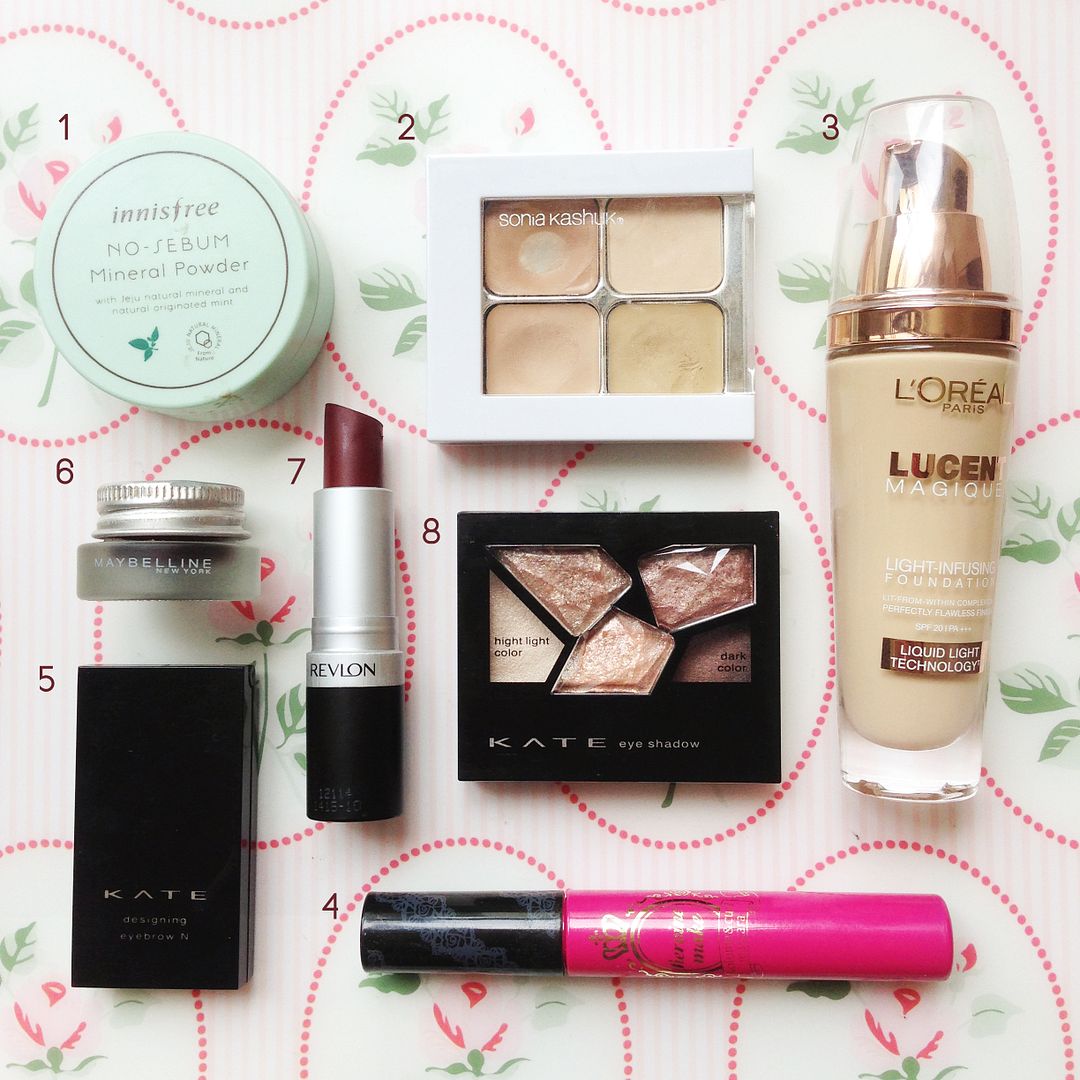
from left to right, clockwise:
1. innisfree no-sebum mineral powder
2. sonia kashuk hidden agenda concealer palette 07
3. loreal lucent magique foundation N2 pure porcelain
4. heroine make volume and curl mascara
5. kate designing eyebrow N EX-4
6. maybelline eye studio creamy gel liner 02 brown
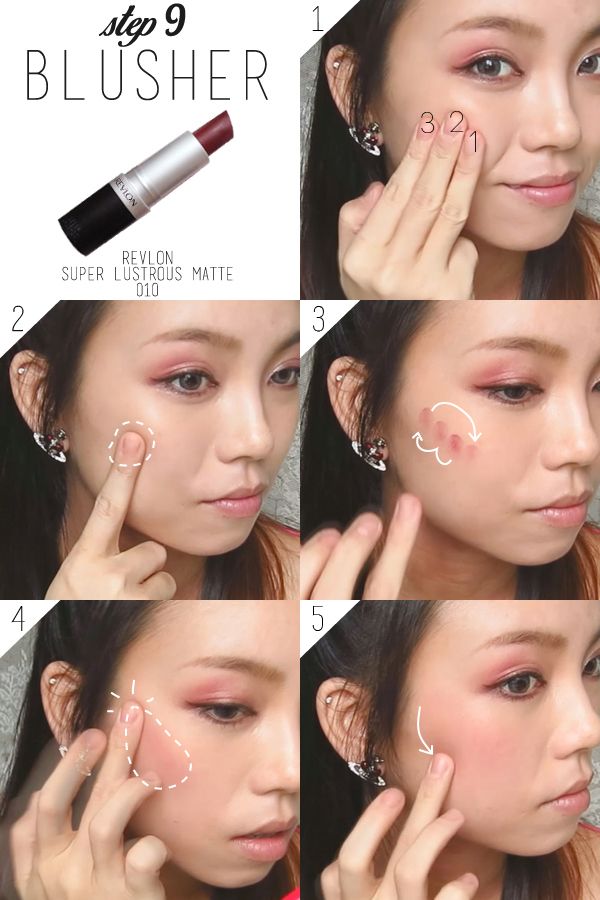
7. revlon super lustrous matte 010 wine not
8. kate colorcious diamond BR-1
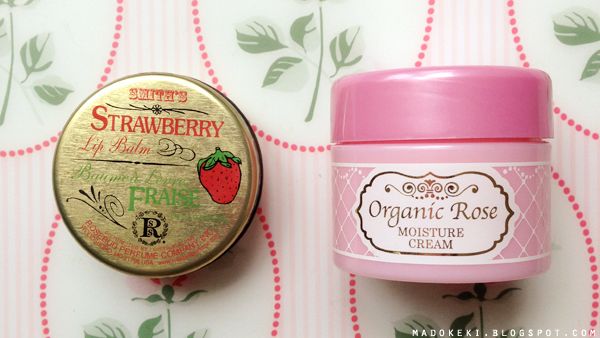
from left to right:
1. smith's strawberry lip balm
2. meishoku organic rose moisture cream
BRUSHES USED:
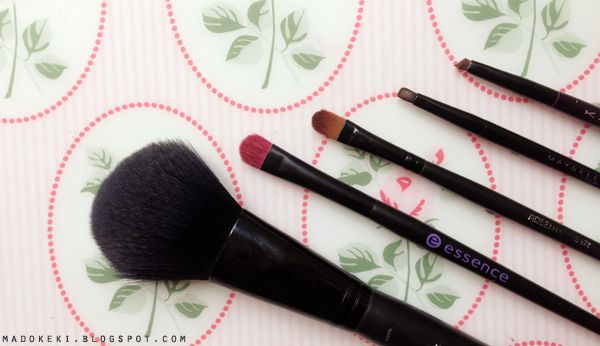
from left to right:
1. elf studio complexion brush
2. essence eyeshadow brush
3. generic eyeshadow brush (flat and has a rectangular surface for picking up colours)
4. maybelline eyeliner brush
5. kate eyeliner brush (cut into an angled brush for eyebrow)
PICTORIAL_________________________________________________________________
simple pictorial to supplement the video! i've marked out all the different areas for different products!
FACE:
the moisture cream and moisturizing foundation is meant for dryer climates since autumn tend to be drier. this is just a demonstration! please use your trusted foundation according to your climate and needs. switch up the heavy cream with a light lotion if necessary.
the warmth from the hands help the foundation stay even closer to your skin!
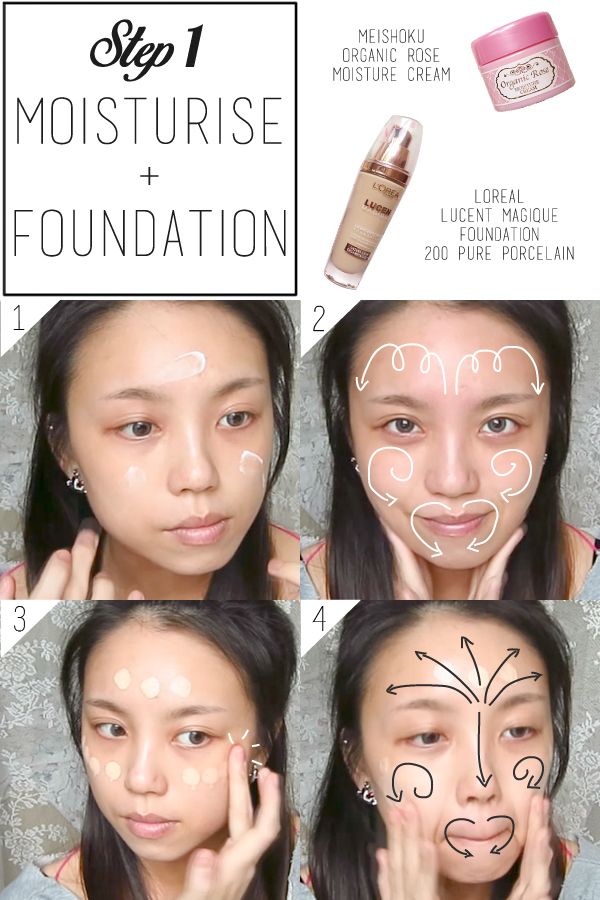
click on image to enlarge!
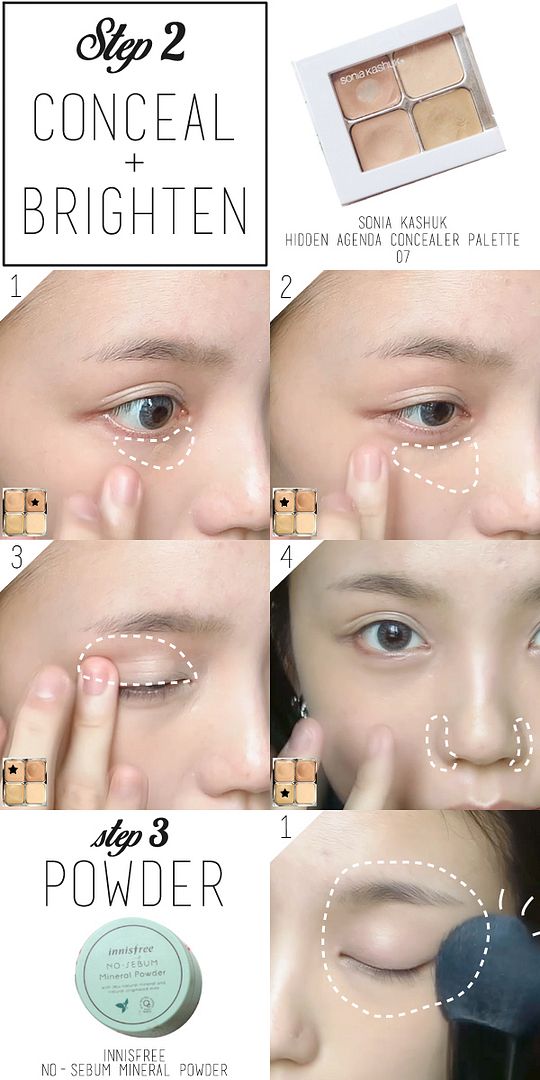
make sure to conceal and colour correct any form of redness on your face. you wouldn't want redness for this look because burgundy is already reddish hued. more redness on your face will tip the entire balance of this look off the scale. also, as the eyes are taking on a darker look, brighten the under eye area for better contrast.
if you've no idea how to conceal the dark circles, you may like to refer to this entry where i go more in depth into that science behind it. basically you'll need a slightly darker colour to colour correct and cover the dark circles (for my skintone, a peach colour worked great), followed up with brightening with a lighter shade. i went beneath my "eye bags" to lighten up the shadow and to lift my inner cheek area.
set the concealer by patting the fluffy brush over the entire eye area. keep the face powder-free.
click on image to enlarge!
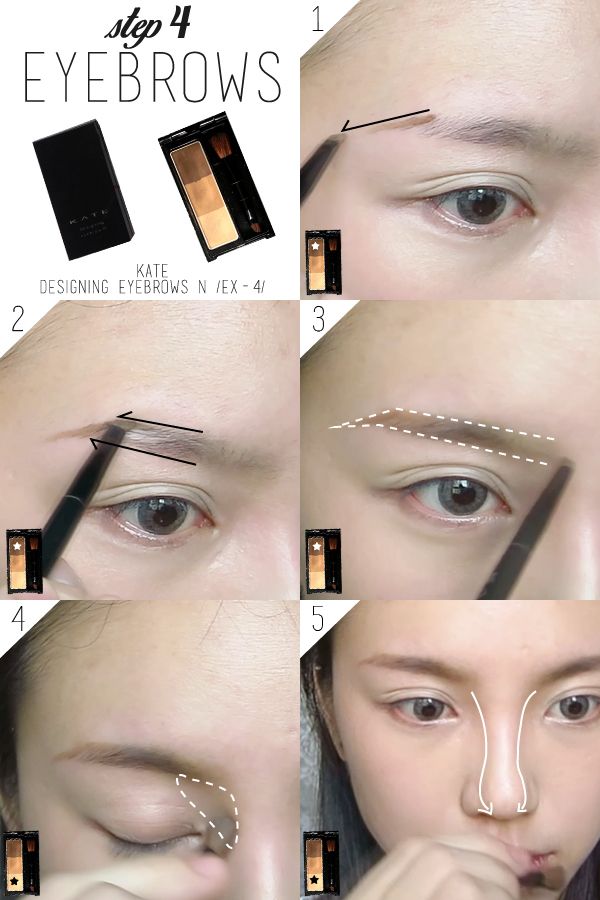
EYEBROWS:
i made my brows look more arched for this look because you can't deny it: this look is leaning on the more mature side. an arched brow will complement the look really well.
if you don't know how to make your eyebrow appear more arched, just extend the first line downwards, beyond the end of your eyebrows.
make sure to contour your nose as we wouldn't be using a highlighter for this look as there will be too many focus on the face in that case.
EYES:
before you start on your eyes, you'd need to find out where is the hollow of your eyes first. i poked my eyes to show you what i'm talking about. you really just need to feel the bone with your finger. use that as a guide for this look.
in the pictorial below, that guide is denoted by the white dotted line. the first wash of burgundy goes slightly beyond the dotted line (the middle of your finger pad should be touching the socket bone boundary, this will already get the colour beyond the socket).
slowly build up the burgundy colour to get that wonderful gradient, the area gets progressively smaller so most of the colour is concentrated nearer to the lash line. we'll then smoke it out with a dash of dark brown near the lash line, making sure to blend it upwards but not exceeding the height of the burgundy colour.
don't forget to blend out any harsh edges with your finger (in the 6th and 7th picture).

click on image to enlarge!
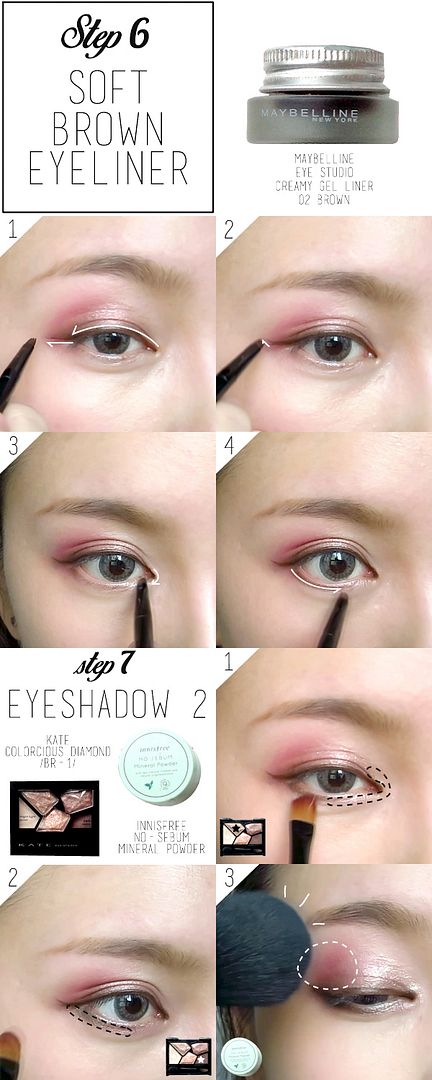
use a brown eyeliner to complement the burgundy colour. you don't need a very distinct eyeliner for this look in fact. give it a slight wing for a flirty look.
add some bling into the eyes (as always! i don't think i ever did a look WITHOUT glitter) to add to the contrast.
the matte lipstick blends really easily, but it will definitely require setting because it does come off by rubbing. set it the way you set the concealer.
click on image to enlarge!
apply the mascara. i used a waterproof formula to hold curls better. focus the mascara on the inner half of the lashes to contrast the brighter inner part of the eyes.
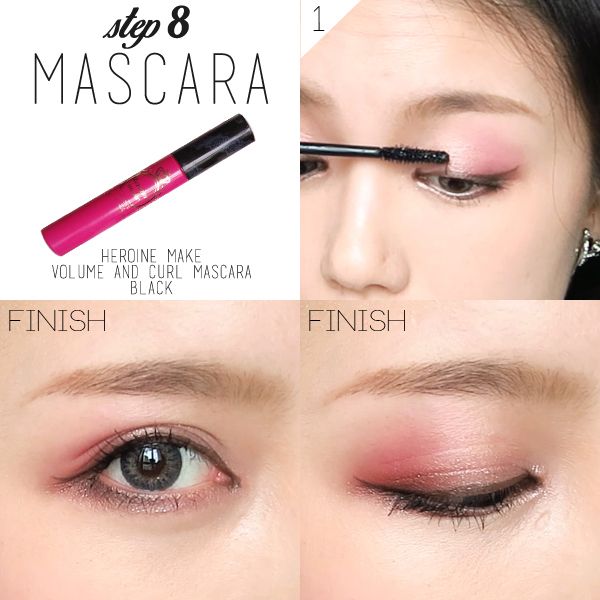
click on image to enlarge!
CHEEKS AND LIPS:
another special point of this makeup: the blusher will be on the outer half of the cheeks. use your fingers as a guide to help you find where to concentrate the colours on.
place your ring finger on the apples of your cheeks, the part where your first finger rest upon is the part which should get the most colour.
again, using your bone structure as a guide, dot along your cheek bone, blending the colour below your cheekbone initially before blending out the edges above the cheekbones. this will get you a more contoured face very very naturally.
click on image to enlarge!
moisturize your lips with a lip balm, blot off the excess so that the lip colour can go on easier. if you want a tinted look, dot the lipstick on. for a slightly darker look, apply more lipstick on the inner half of your lips.

click on image to enlarge!
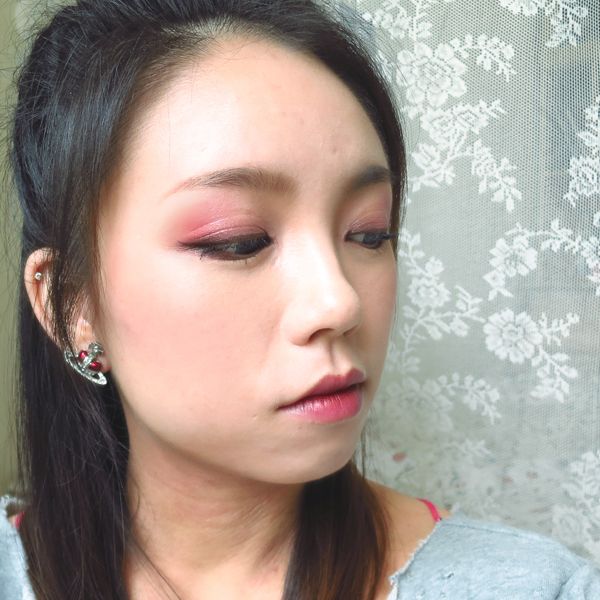
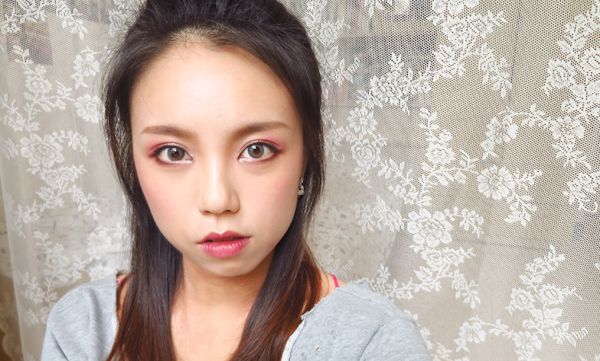
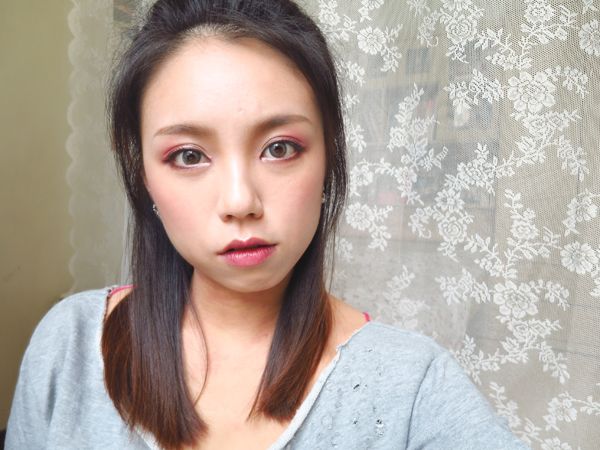
FINISHED LOOK____________________________________________________________
i happened to take more selfies this time because i actually remembered to. :)
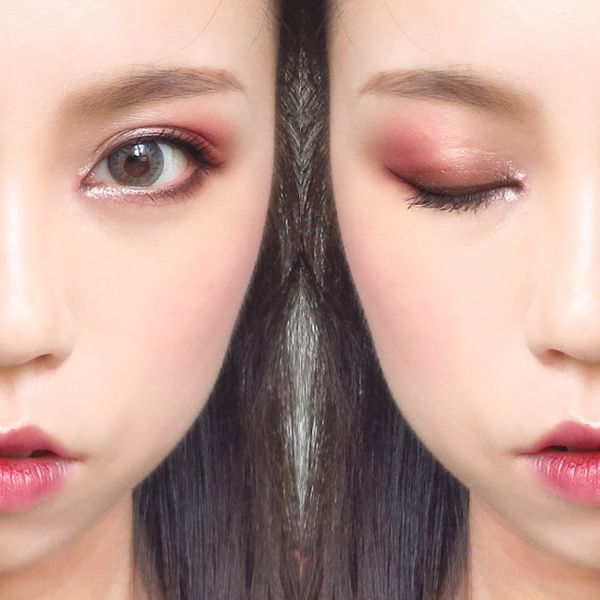
i'm wearing my geo tri colour gray. it's the only colour lens i have for now.
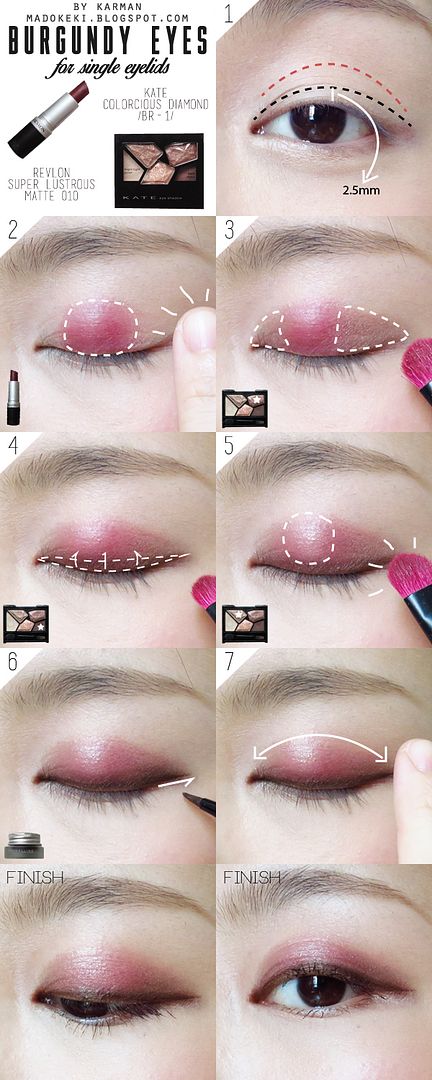
FOR SINGLE EYELIDS
i was inspired by an eye look i saw on the etude house community one day, i thought it suited single eyelids SO PERFECTLY. i don't have single eyelids, so this is the best i can do when it comes to a tutorial for single eyelids.step 1 requires you to decide where you want the boundary to be.
1. the black line is about 2.5mm above your visible lash line when your eyes are open (very important for you to find this boundary with opened eyes). feel free to change this height according to your liking. for a lighter look, stick to a smaller number.
2. the red line is on your socket line and is the maximum height you can go for, this will be a slightly heavier look. anything above the socket line may look out of proportions.
once you decided which boundary to use, just follow the steps. the techniques are the same, the only difference is the colour difference.
click on image to enlarge!
FINAL LOOK
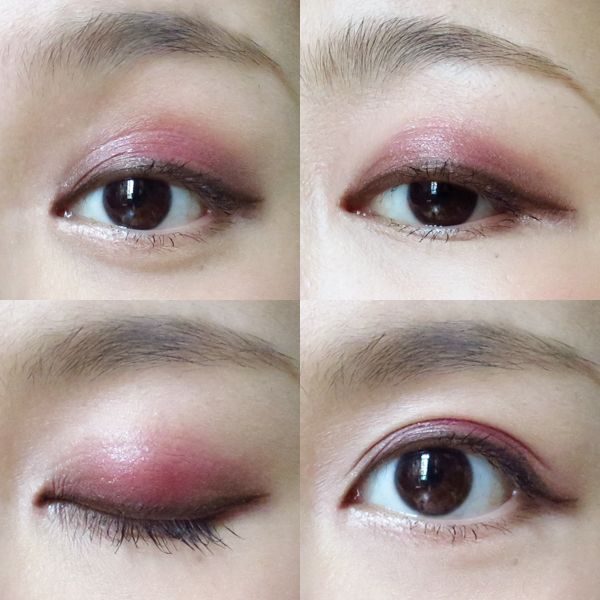
clearly, this colour placement don't look that good when my eyes are fully opened because my eyelid folds covered all of the gradient. what you see is a very distinct "cut" between the colour and my skin. that's why.. i do not have enough lid space (space between my eyelid fold and my eyebrow) to do a gradient. i'd say this look is suitable not just for single eyelids, but also for people with a lot of eyelid space. typically, they happen to have single eyelid or very narrow double eyelids.
hope you like this tutorial!
xoxo
karman


No comments:
Post a Comment